The Lippert 4-Point Leveling System is a hydraulic leveling solution designed for RVs, offering four-point contact and a three-valve manifold for enhanced stability, safety, and comfort.
1.1 Overview of the System
The Lippert 4-Point Leveling System is a hydraulic leveling solution designed for RVs, utilizing four points of contact and a three-valve manifold for precise stabilization. It features a 12V DC electric motor driving a hydraulic pump, which distributes fluid through hoses and fittings to steel or aluminum jacks. This system ensures proper leveling and stability, enhancing safety and comfort during travel. It operates in both automatic and manual modes, with automatic retraction of jacks for convenience. The system is specifically designed for use on Sprinter chassis, offering a reliable and efficient leveling experience for RV owners.
1.2 Importance of Leveling in RVs
Proper leveling is crucial for RV safety, functionality, and comfort. Improper leveling can lead to issues such as door misalignment, cabinet instability, and even safety hazards. Additionally, it ensures a stable living environment, preventing tilting and uneven surfaces that can disrupt daily activities and sleep. The Lippert 4-Point Leveling System is designed to provide accurate and efficient leveling, ensuring your RV remains stable and secure, which is essential for a safe, enjoyable, and stress-free travel experience.
Key Features of the Lippert 4-Point Leveling System
The system includes a 4-point contact design, 3-valve manifold, hydraulic operation, and auto/manual modes, ensuring precise leveling, stability, and ease of use for RVs.

2.1 Hydraulic vs. Manual Leveling
The Lippert 4-Point Leveling System offers both hydraulic and manual leveling options. Hydraulic leveling provides faster, effortless adjustments via a 12V DC motor-driven pump, while manual mode allows precise control for fine-tuning. The system automatically retracts jacks when not in use, enhancing convenience. Hydraulic operation is ideal for quick stabilization, whereas manual mode is useful for minor adjustments or when hydraulic power is unavailable. This dual functionality ensures versatility and reliability, catering to various RV leveling needs.
2.2 4-Point Contact System
The Lippert 4-Point Leveling System utilizes four points of contact—front, rear, left, and right—to ensure even weight distribution and stability. This system is designed for Sprinter chassis RVs and features a three-valve manifold for precise control. The four-point contact system enhances safety by preventing wobbling and uneven settling, ensuring a stable foundation for the vehicle. It is a key component of the hydraulic leveling system, providing efficient and reliable leveling performance for a comfortable and secure RV experience.
2.3 3-Valve Manifold System
The 3-Valve Manifold System is a critical component of the Lippert 4-Point Leveling System, enabling precise control over hydraulic fluid flow to the jacks. This system ensures efficient and synchronized operation, allowing for accurate leveling and stabilization of the RV. The manifold works in conjunction with the hydraulic pump and motor to distribute fluid pressure evenly across all four jacks, providing a stable and balanced foundation. Its design enhances the overall performance of the leveling system, making it a key feature for reliable and efficient RV stabilization.
2.4 Auto and Manual Modes
The Lippert 4-Point Leveling System offers both Auto and Manual modes for flexible operation. In Auto mode, the system uses sensors to automatically level the RV, ensuring quick and precise stabilization. Manual mode provides direct control over each jack, allowing for fine adjustments. The control panel features buttons for selecting between modes, while an emergency manual override ensures functionality even in case of system failure. This dual-mode capability enhances user convenience and ensures reliable performance in various scenarios.
System Components and Configuration
The Lippert 4-Point Leveling System includes a hydraulic pump, steel or aluminum jacks, hoses, fittings, and a control panel, working together to provide precise stabilization and control.
3.1 Hydraulic Pump and Motor
The hydraulic pump and motor are central to the Lippert 4-Point Leveling System, providing the power needed to move fluid through the system. A 12V DC electric motor drives the pump, ensuring efficient operation. This component is essential for both automatic and manual leveling modes, enabling the system to stabilize the RV quickly and accurately. Proper maintenance of the pump and motor is crucial to ensure longevity and reliable performance. Regular checks and fluid level monitoring are recommended to prevent issues.
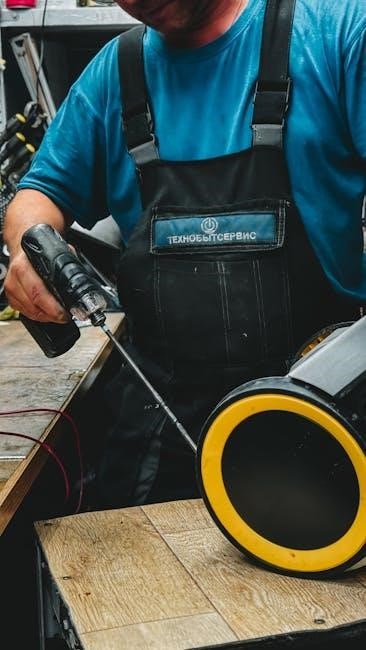
3.2 Steel or Aluminum Jacks
The Lippert 4-Point Leveling System utilizes durable steel or aluminum jacks, designed to provide reliable support and stability. Steel jacks offer superior strength and durability, making them ideal for heavy-duty applications, while aluminum jacks are lighter and corrosion-resistant, suitable for lighter RVs. Both options ensure consistent performance and are built to withstand the rigors of frequent use. Proper maintenance, including regular lubrication and inspection, is essential to extend the lifespan of the jacks and ensure optimal system functionality.
3.3 Hose and Fittings
The Lippert 4-Point Leveling System relies on high-quality hoses and fittings to ensure proper hydraulic fluid flow. These components are designed to withstand pressure and environmental factors, providing reliable performance. Regular inspection of hoses and fittings is crucial to prevent leaks and maintain system efficiency. Proper installation and tightening of fittings are essential to avoid damage or fluid loss. Durable materials are used to ensure longevity, making the system robust and dependable for consistent RV leveling and stabilization. Maintenance guidelines recommend periodic checks to ensure optimal functionality.
3.4 Control Panel and Buttons
The control panel is the central interface for operating the Lippert 4-Point Leveling System. It features buttons for automatic and manual modes, allowing users to easily control the hydraulic jacks. The panel includes a power button to activate or deactivate the system and specific buttons for front and rear jack operation. LED indicators provide visual feedback on system status. The control panel is designed for intuitive use, ensuring quick and precise leveling adjustments. Regular checks of the buttons and panel ensure proper functionality and safe operation of the leveling system.
Installation and Setup
The Lippert 4-Point Leveling System requires pre-installation checks, including RV battery specifications. Follow the step-by-step guide for proper setup and configure the system for optimal performance.
4.1 Pre-Installation Requirements

Before installing the Lippert 4-Point Leveling System, ensure your RV meets specific requirements, such as a compatible 12V DC electrical system. Verify the battery specifications to support the hydraulic pump and motor. Proper electrical connections are crucial for system functionality. Additionally, ensure the RV chassis is compatible, as the system is designed for use on Sprinter chassis. Always follow the manufacturer’s guidelines and consider consulting a qualified technician for a safe and accurate installation process.
4.2 Step-by-Step Installation Guide
Begin by preparing the necessary tools and components. Mount the hydraulic pump and motor securely to the RV frame. Connect the hoses and fittings to the jacks, ensuring proper alignment. Install the control panel in an accessible location and wire it to the RV’s electrical system. Activate the system to test hydraulic flow and jack movement. Finally, perform a leveling test to ensure all components function correctly. Always refer to the manual for specific torque and wiring specifications to ensure a safe and proper installation.
4.3 System Configuration Modes
The Lippert 4-Point Leveling System offers multiple configuration modes to suit different RV setups. The automatic mode allows for quick, hands-free leveling, while the manual mode provides precise control. The system also features a “zero point” configuration for resetting the leveling parameters. Additionally, the automatic retraction feature ensures jacks retract when the system is idle or power is turned off. Configuration modes can be adjusted via the control panel, and error codes will display if issues arise during setup. Always refer to the manual for specific mode settings and troubleshooting guidance.

Operating the Lippert 4-Point Leveling System
Operating the system involves selecting between automatic and manual modes for precise RV stabilization. The system automatically retracts jacks when idle or powered off, ensuring convenience and safety.
5.1 Automatic Leveling Mode
The automatic leveling mode simplifies RV stabilization by using a 12V DC motor to power a hydraulic pump. This mode assesses the RV’s position and adjusts the jacks to achieve optimal leveling. The system ensures even ground contact, enhancing stability and safety. With the press of a button, the jacks extend or retract as needed, minimizing manual effort. The automatic mode is ideal for quick setups, providing a hassle-free experience. The system also features an idle shutdown after four minutes to conserve battery life, ensuring efficient operation during use.
5.2 Manual Leveling Mode
The manual leveling mode allows users to control the jacks individually for precise adjustments. By pressing the respective buttons, users can extend or retract each jack to achieve the desired leveling. This mode is useful for fine-tuning the RV’s position or when automatic mode is not suitable. The system retains manual control even if error codes appear, ensuring flexibility. However, manual operation requires careful monitoring to avoid over-extension or uneven leveling. Always ensure the RV is on level ground before switching to manual mode for optimal results and safety.
5.3 Error Codes and Solutions
The Lippert 4-Point Leveling System displays error codes to indicate specific issues. Common codes include system malfunctions or jack position errors. If an error occurs, the system retains manual control, allowing users to adjust jacks individually. For example, if the system fails to retract automatically, manual retraction can be performed. Always refer to the manual for code meanings and troubleshooting steps. If issues persist, contact Lippert support for assistance. Regular maintenance and proper usage can help minimize errors and ensure smooth operation.
5.4 Automatic Retraction of Jacks
The Lippert 4-Point Leveling System features automatic retraction of jacks for convenience and safety. After four minutes of inactivity, the system shuts off and retracts the jacks automatically. This ensures the RV is secure and ready for travel. If leveling is interrupted, pressing the ‘LEVEL’ button resumes the process from the last known position. Manual retraction is also possible if needed. Always ensure jacks are fully retracted before moving the vehicle to avoid damage or safety hazards. Follow the manual for proper retraction procedures and safety guidelines.

Maintenance and Troubleshooting
Regularly check hydraulic fluid levels, clean the system, and inspect hoses and fittings for damage. Address error codes promptly and reset the system if necessary. Refer to the manual for troubleshooting common issues and follow safety guidelines to ensure proper function and longevity of the Lippert 4-Point Leveling System. Consult professionals for complex repairs to maintain safety and performance.
6.1 Routine Maintenance Checks
Regular inspections are crucial for optimal performance. Check hydraulic fluid levels, ensuring they meet recommended specifications. Inspect hoses and fittings for signs of wear or damage. Verify that all electrical connections are secure and free from corrosion. Test the control panel buttons to ensure proper function. Look for any error codes on the display and address them promptly. Perform a system reset if necessary. Always refer to the manual for detailed procedures and guidelines to maintain the system’s efficiency and safety. Regular maintenance helps prevent issues and extends the lifespan of the leveling system.
6.2 Common Issues and Solutions
Common issues include error codes, system shutdown after 4 minutes of inactivity, and manual control malfunctions. Solutions involve checking electrical connections, ensuring proper hydraulic fluid levels, and resetting the system. If error codes appear, refer to the manual for specific troubleshooting steps. For manual mode issues, activate the rear jack button and ensure the power button is functioning. Regularly inspect hoses and fittings for damage. Addressing these issues promptly ensures smooth operation and prevents further complications. Always consult the manual for detailed solutions to maintain system performance and safety.
6.3 Hydraulic Fluid and System Care
Regular maintenance of the hydraulic system is crucial for optimal performance. Check hydraulic fluid levels periodically and top up as needed using the recommended type of fluid. Inspect hoses and fittings for damage or leaks, replacing them if necessary. Avoid contamination of the hydraulic fluid, as it can lead to system failure. Proper care ensures smooth operation and prevents costly repairs. Neglecting maintenance may result in system malfunction or void the warranty. Always refer to the manual for specific fluid requirements and care instructions.
Safety Information and Warnings
The Lippert 4-Point Leveling System is designed solely for leveling and stabilization. Misuse, such as supporting the RV for other purposes, is prohibited and may cause serious injury or death. Always follow the manufacturer’s guidelines and safety precautions to ensure proper operation and avoid system damage. Refer to the manual for detailed safety information and warnings to maintain safe usage and compliance with warranty terms.

7.1 Proper Usage Guidelines
The Lippert 4-Point Leveling System is designed exclusively for leveling and stabilizing RVs. Always use the system as intended and avoid supporting the coach for purposes other than leveling. Follow the manufacturer’s instructions to prevent damage or safety risks. Ensure the system is not used on uneven surfaces or in conditions that exceed its design limits. Regularly inspect hydraulic components and maintain proper fluid levels. Avoid overloading the jacks beyond their rated capacity. Adhere to all safety precautions outlined in the manual to ensure safe and effective operation.
7.2 Safety Precautions
The Lippert 4-Point Leveling System is designed solely for leveling and stabilizing RVs. Never use it to support the coach for purposes other than leveling. Ensure the system is not overloaded or used on surfaces that exceed its weight limits. Always operate on firm, level ground to prevent instability. Avoid using the system near open flames or sparks, as hydraulic fluid can ignite. Never exceed the recommended weight capacity of the jacks. Follow all guidelines in the manual to ensure safe operation and avoid potential hazards.
7.3 Emergency Procedures
In case of system failure or malfunction, immediately shut off the power to the leveling system. If error codes appear, refer to the manual for troubleshooting. Never attempt to manually adjust the jacks while the system is operational. If the system fails to retract, ensure the RV is on level ground and use the manual override feature. Contact Lippert support for assistance. Always prioritize safety and avoid operating the RV until the issue is resolved. Follow the manual’s emergency guidelines to prevent further complications.

Lippert Leveling System Manual
The manual provides detailed instructions for operating, maintaining, and troubleshooting the Lippert 4-Point Leveling System, ensuring safe and effective use of its hydraulic features and modes.
8.1 Manual Components and Structure
The Lippert 4-Point Leveling System manual is structured to guide users through installation, operation, and maintenance. It includes sections on features, operation modes, safety precautions, and troubleshooting. The manual also covers error codes, system configuration, and hydraulic fluid care. Detailed diagrams and charts illustrate key components like the hydraulic pump, jacks, and control panel. Appendices provide quick reference guides and contact information for support. This comprehensive resource ensures users can effectively utilize and maintain their leveling system, enhancing safety and performance.
8.2 Downloading and Accessing the Manual
The Lippert 4-Point Leveling System manual is available for download as a PDF from the Lippert Components website or through a QR code provided in the product packaging. Ensure compatibility with your device and Adobe Acrobat for viewing. The manual is regularly updated, so always download the latest version. For assistance, contact Lippert support using the information provided in the manual. An internet connection is required for download, and the manual is optimized for digital viewing on smartphones, tablets, and computers.
Comparison with Other Leveling Systems
The Lippert 4-Point Leveling System stands out for its hydraulic efficiency and 4-point stability, offering superior performance compared to electric systems and other manual leveling solutions.
9.1 4-Point vs. 6-Point Leveling Systems
The Lippert 4-Point Leveling System offers a compact and efficient solution, ideal for lighter RVs, while 6-point systems provide greater stability for larger vehicles. The 4-point system is simpler, with fewer components, making it easier to maintain and install. In contrast, 6-point systems offer additional contact points, enhancing stability on uneven terrain. Both systems ensure proper leveling but cater to different RV sizes and user preferences. The choice depends on the vehicle’s weight and the owner’s need for advanced stabilization features.
9.2 Hydraulic vs. Electric Leveling Systems
Hydraulic leveling systems, like the Lippert 4-Point, use fluid pressure for robust and precise leveling, ideal for heavy-duty applications. Electric systems rely on motors for quieter operation. Hydraulic systems offer greater lifting capacity and durability, making them suitable for larger RVs, while electric systems are lighter, faster, and require less maintenance. The choice depends on the RV’s size, weight, and user preference for power versus convenience. Both systems ensure stability, but hydraulic systems are preferred for their reliability in demanding conditions.
Frequently Asked Questions (FAQs)
- What causes error codes in the Lippert system?
- How does manual mode differ from automatic?
- Why does the system shut off after four minutes?
10.1 Common User Questions
Users often ask about error codes, manual vs. automatic modes, and system shutdown after four minutes. Others inquire about hydraulic fluid requirements, jack retraction, and troubleshooting steps. Many seek clarity on the difference between 4-point and 6-point systems, while some question compatibility with specific RV models. Additionally, users frequently ask about the location of components like the control panel and manifold. These questions highlight common concerns about operation, maintenance, and system functionality, ensuring safe and effective use of the Lippert 4-Point Leveling System.
10.2 Contact Information for Support
For assistance with the Lippert 4-Point Leveling System, contact Lippert Components at www.lippertcomponents.com. Call their customer support at 1-800-LEARN-MORE or email support@lippertcomponents.com. Visit their website for manuals, FAQs, and troubleshooting guides. Representatives are available to address technical inquiries, warranty questions, and system operation concerns. Ensure to have your system model and serial number ready for efficient support. Lippert Components is committed to providing timely and effective solutions for your leveling system needs.

Conclusion
The Lippert 4-Point Leveling System offers a reliable and efficient solution for RV stabilization, combining advanced hydraulic technology with user-friendly operation. By following the manual’s guidelines, users can ensure optimal performance, safety, and longevity of the system. Regular maintenance and adherence to safety protocols are crucial for maximizing its benefits. Lippert Components remains committed to providing high-quality products and exceptional customer support, making the 4-Point Leveling System a trusted choice for RV enthusiasts seeking comfort and stability on the road.